


Welcome to this new article 👋
According to a poll on my Twitter, most of you are interested in learning more about React state management in 2022. It took some time but I finally found the time to write it properly!
Today, I'm going to introduce you Recoil, a global state management library developed and maintained by Meta.
First, I will explain what Recoil is, why it is different from other common solutions and finally we'll build a small app to illustrate what we've seen (link to the github repo at the end).
This article was written and published using Xpost, a productivity tool for technical writer I'm currently building in public.
Here we go!
Why Recoil
A lot of solutions are available when it comes to handling global state management in React.
Disclaimer: this tutorial is focused on client side state management but it also exists server side ones (like react-query or SWR) that we can talk another time!
Context API
The first one, which I have already spoken about here, is the built-in Context API. As I explained, this API is really powerful and is enough for small/medium projects. However, it is intended to share global data only because it will re-render every child component on change which may result in performance issues.
Redux
Another one could be Redux. It's a really well-known library for managing global state, it's a robust and reliable solution, that's why a lot of companies still use it at the moment. Nevertheless, it requires a lot of configuration and boilerplates code to work properly. Moreover, from my experience, the learning curve for juniors is quite sharp.
Recoil
Recoil is (at the moment) less known but is the most promising way for the upcoming years. It offers to manage the global state at the atomic level (you will understand what does it means in a second).
Recoil made global state management way easier to maintain by drastically reducing boilerplates and configuration.
Unlike other solutions, it allows to keep the state as close as possible to the subscribers (components) thus avoiding unnecessary re-rendering and improving performance.
Moreover, Recoil provides a react-like syntax and behavior, the learning curve is therefore pretty soft when you already know how to use hook like useState.
Last but not least, because Recoil is developed and maintained by Meta it supports latest React features like concurrent mode, suspense, error boundaries... and works also with React Native!
There are other libraries like Jotai that share the same concept.
When to use
As for each library installed in your project, Recoil is an additional dependency, you need then to make sure it meets your needs (complexity, scalability, performance) before considering using it.
But you may ask yourself "how to know if it meets my needs ?" ?
In my case, as soon as a project get big enough (lots of components) and complex (multiple contexts, heavy component dependencies etc), I ask myself "would using Recoil help me improve the scalability and performance of the code base ?". If so, I consider implementing it.
Recoil concept
First of all, let's define some Recoil concept that will help you to follow along with this tutorial:
Atom
An Atom is a piece of global state that can be updated and subscribed by components. To be defined, an atom only needs a unique key and a default value. When a component subscribes to an atom it will be automatically re-render if the value changes.
// create atom
const nameState = atom({
  key: 'nameState', // mandatory, must be unique
  default: null, // mandatory default value
  effects: [   // optional array of effects similar to useEffect ]
});

// then use it in components with hooks:

// get value and setter
const [name, setName] = useRecoilState(nameState);
// get only value
const name = useRecoilValue(nameState);
// get only setter
const setName = useSetRecoilState(nameState);
Selector
A Selector is a pure function that can be used to derive atoms and other selectors (synchronously or asynchronously). The selector is automatically refreshed on each change of atom or selector consumed. They can then be used (just like atoms) in components.
// create selector
const charCountSelector = selector({
  key: 'charCountSelector', // mandatory & unique
  get: ({get}) => {
    // consume other atom or selector
    // if nameState change selector will be refreshed automatically
    // and it's subscribers too
    const name = get(nameState);
    return name.length;
  },
});

// use it in components
const count = useRecoilValue(charCountSelector);
Data flow graph
One of the most interesting things here is when you start building with atoms and selectors you get a scalable data graph that will automatically update subscribers (selectors & components) on state change.
Thanks to these data flow it is pretty easy to build reactive apps. Let's imagine we have an atom corresponding to a selected item and a selector responsible for getting latest selected item details. Using Recoil, updating the atom will automatically trigger the selector (request the selected item details) and then notify the subscriber (UI component) to re-render.
Looks like magic right ? 😅
Enough talk, let's see how to implement it in a new app!
Implementation
Disclaimer: I will focus on explaining the Recoil part of the app if you are interested by the style, or simply want to check the code here is the link to the repo. Feel free to send me a message on Twitter if you any questions / comments.
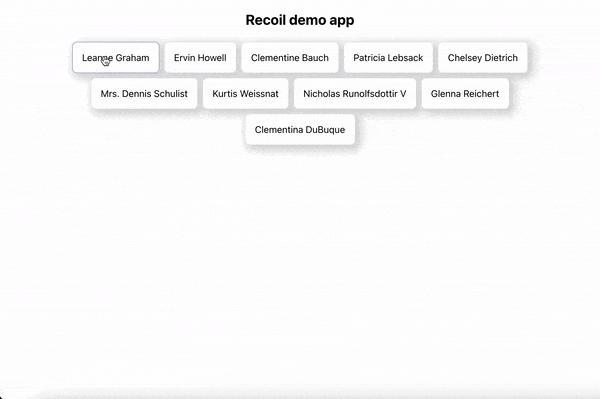
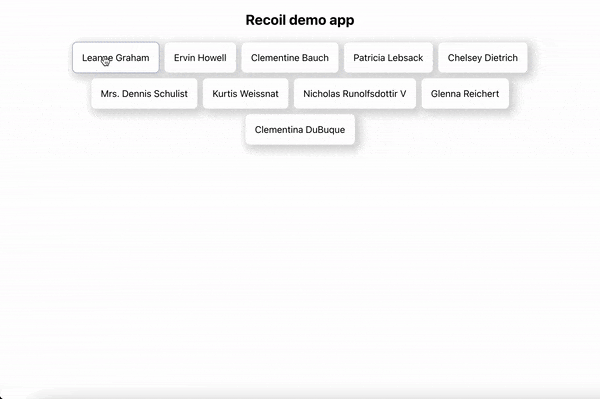
As you can see below, our app will contain a list of users, clicking on a user card will select them, get their information and retrieve their blog posts from the API. Before being displayed their posts will then be filtered by category to appear in a bar chart.
Configure Recoil
Configuring Recoil is really easy it only requires two steps. First, let's install the library:
npm install recoil
// or if you use yarn
yarn add recoil
Then, simply wrap your app in a RecoilRoot provider
function App() {
  // RecoilRoot needs to wrap all component using atoms and selectors
  return (
    <RecoilRoot>
      ...
    </RecoilRoot>
  );
}
And that's it! You're now able to create atoms and selectors! ⚡️
💡 Pro-tips: a good practice here is to use an ErrorBoundary and Suspense components to handle both loading and error states that could happen in your
RecoilRoot. Here is my final version:
function App() {
  return (
    <ErrorBoundary>
      <RecoilRoot>
        <Suspense
          fallback={
            <Fallback>
              <Spinner />
            </Fallback>
          }
        >
          <Home />
        </Suspense>
      </RecoilRoot>
    </ErrorBoundary>
  );
}

export default App;
Architecture
Recoil doesn't impose architecture or naming convention. As you can see, in my case, I like to keep all my Recoil-related stuff into a store folder. Inside this folder, atoms and selectors are separated in folders respectively named.
💡 You could also choose to keep your atoms and selectors separated by concern (for ex. all user related stuff in a folder). Once again, it depends of your needs.
Finally, I like to suffix atoms and selectors with their type (for ex. nameAtom.ts and charCountSelector).

List of users
For our use case, we will need two atoms. The first one will contain the list of users and the second the id of the selected one.
// ./src/store/atoms/userListAtom.ts
import { atom } from 'recoil';
import { getUsers } from '../../lib/jsonPlaceholder';
import { User } from '../../models/User';

const userListAtom = atom<User[]>({
  key: 'userListAtom',
  // get users from API and use it as default value
  default: getUsers(),
});

export default userListAtom;
This first atom is simple, we just defined a key and a default value to be our list of users.
// ./src/store/atoms/selectedUserIdAtom.ts
import { atom } from 'recoil';

const selectedUserIdAtom = atom<number | null>({
  key: 'selectedUserIdAtom',
  default: null,
});

export default selectedUserIdAtom;
This second atom is similar, excepted that we defined our default value to null because no user is selected at first.
Once defined we can directly use these atoms in our UserList component. This component will display each user in a card, a click on card will update our selectedUserIdAtom.
UI components (
List&ClickableCard) are available in the repo.
// ./src/components/UserInfo.tsx
export default function UserList() {
  const users = useRecoilValue(userListAtom);
  const [userId, setUserId] = useRecoilState(selectedUserIdAtom);

  return (
    <List>
      {users.map(({ id, name }) => (
        <ClickableCard
          key={id}
          isSelected={id === userId}
          onClick={() => setUserId(id)}
        >
          {name}
        </ClickableCard>
      ))}
    </List>
  );
}
Now that we have our working user list let's get the infos and posts for the selected user!
Selected user details
To do so, we we will need 3 selectors. Let's start by retrieving selected user informations.
const selectedUserSelector = selector({
  key: 'selectedUserSelector',
  get: ({ get }) => {
    // subscribe to our atoms
    // selector will be updated if any of the two change
    const users: User[] = get(userListAtom);
    const selectedId = get(selectedUserIdAtom);

    const result = users.find(({ id }) => id === selectedId);
    return result;
  },
});

export default selectedUserSelector;
This first selector will only be responsible for deriving our atoms. If found, it returns the selected user.
You can try it by adding this to the UserInfo component
// ./src/components/UserInfo.tsx
export default function UserInfo() {
  const selectedUser = useRecoilValue(selectedUserSelector);

  if (selectedUser) {
    return (
      <CenteredCard>
        <h3>Selected user details</h3>
        <span>name: {selectedUser.name}</span>
        <span>email: {selectedUser.email}</span>
        <span>company: {selectedUser.company.name}</span>
      </CenteredCard>
    );
  }
  return null;
}
Now, we need to get the posts for our selected user. A common pattern to fetch these data in React would be to use a useEffect hook.
However, using Recoil we can delegate this task to another selector:
// ./src/store/selectors/postByUserSelector.ts
const postByUserSelector = selector({
  key: 'postByUserSelector',
  get: async ({ get }) => {
    try {
      // refresh each time we select a new user id
      const selectedId = get(selectedUserIdAtom);
      let result: Post[] | null = null;
      if (selectedId) {
        // if a user is selected => get posts for this id
        result = await getPostsByUser(selectedId);
      }
      return result;
    } catch (error) {
      throw error;
    }
  },
});

export default postByUserSelector;
This selector will be automatically called every time a new user is selected. By subscribing to it, it ensures we will have the posts for the latest user selected.
We need now to transform this output (array of posts) to a dataset for our chart (number of post per category). We could have implemented it in this selector, but it might be useful to be able to access "raw" posts data so we are going to create a last new selector.
// ./src/store/selectors/postByCategorySelector.ts
const postByCategorySelector = selector({
  key: 'postByCategorySelector',
  get: ({ get }) => {
    // subscribe to our previous selector
    const posts = get(postByUserSelector);

    // generate array of number
    const result = fakeCategories.map((category) => {
      const selectedPosts = posts?.filter((post) => post.category === category);
      return selectedPosts?.length ?? 0;
    });
    return result;
  },
});

export default postByCategorySelector;
Next, we need to subscribe to this selector in our BarChart component
// ./src/components/BarChart.tsx
export default function BarChart() {
  const values = useRecoilValue(postByCategorySelector);

  return (
    <ChartContainer>
      <ReactFrappeChart
        type='bar'
        colors={['#273E89']}
        axisOptions={{ xAxisMode: 'tick', yAxisMode: 'tick', xIsSeries: 1 }}
        height={250}
        data={{
          labels: fakeCategories,
          datasets: [{ values }],
        }}
      />
    </ChartContainer>
  );
}
And then, add it in UserInfo as follow
// ./src/components/UserInfo.tsx
export default function UserInfo() {
  const selectedUser = useRecoilValue(selectedUserSelector);

  if (selectedUser) {
    return (
      <CenteredCard>
        <h3>Selected user details</h3>
        <span>name: {selectedUser.name}</span>
        <span>email: {selectedUser.email}</span>
        <span>company: {selectedUser.company.name}</span>
+        <Suspense
+          fallback={
+            <Fallback>
+              <Spinner />
+            </Fallback>
+          }
+        >
+          <BarChart />
+        </Suspense>
      </CenteredCard>
    );
  }
  return null;
}
As you can see, we are using here another Suspense to wrap our BarChart component. Since BarChart subscribe to an async action (getting posts from the API endpoint) adding a Suspense here allow to manage its pending state separately from the rest of the app.
💡 Thanks to this
Suspensewe are able to display a spinner instead of the chart while fetching posts. Without it,BarChartwould use the nearestSuspense(the one inApp.tsxin our case) and therefore hide every components while loading (which results in a very bad user experience).
Finally, use our components in the Home page
export default function Home() {
  return (
    <HomeContainer>
      <RecoilLogo />
      <UserList />
      <UserInfo />
    </HomeContainer>
  );
}
Congrats! You made it through this entire tutorial! 🎉
Conclusion & going further
After this tutorial, you should now have a good understanding of the basics of Recoil. If you want to go further I suggest you to start by visiting the Recoil documentation website and more especially to check features like:
- atomFamily & selectorFamily
- concurrent requests (waitForAll, noWait...)
- persistence
I hope you learned something useful, if you have any questions/suggestions do not hesitate to join me on Twitter I will be happy to talk with you all.
See you soon! 👋
- Yannick